Introduction
This article will guide you step-by-step on how to set up a Redirect URL integration in 24Metrics. Whether you're using platforms like Everflow, HasOffers, Trackier, Affise, or Cake, or a custom platform, this guide will help you do it right the first time.
Important Note: You only need to create one redirect url integration per platform. Under each integration, you can set an unlimited number of links/offers to screen.
Summary:
| Task | Do This |
|---|---|
| Create Integration | Go to Integrations → +Create → Choose Redirect URL |
| Choose Type | Pick from Platform or Custom Template |
| Parameter Mapping | Only needed for Custom Template |
| Create Link | Copy/paste Offer URL from your platform into 24Metrics |
| Update Platform | Replace Offer URL in your platform with 24Metrics link |
| Enable Filters | Go to Global Filters tab |
| Choose Action for Fraud Clicks | Block or Redirect via Click Screening |
What Is a Redirect URL Integration?
A Redirect URL integration allows 24Metrics to intercept the traffic from your tracking links, screen the traffic for fraud in real time, and then forward only clean clicks to your actual offer (or block/bounce fraud clicks). Think of it like a checkpoint between your tracking platform and your offer.
Two ways to integrate
When you create a Redirect URL integration, you can choose one of two types:
1. Custom Template
Manually define all parameters and macros used in your platform (e.g., clickid, subid, device_id, etc.). Use this if you're using any other platform or a custom-built solution.
2. Platform Template
Pre-configured parameter mapping templates for popular platforms. Use this if your tracking platform is one of the below. Parameters will be auto-mapped for you:
- Everflow
- HasOffers
- Trackier
- Affise
- Cake
Step-by-Step Setup Guide
PART 1: Create the Integration
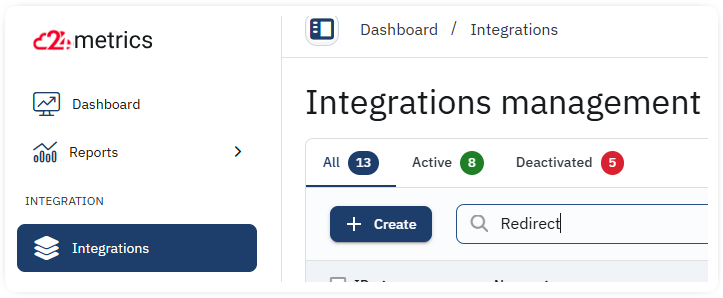
- Go to Integrations section from the main menu.
- Click +Create
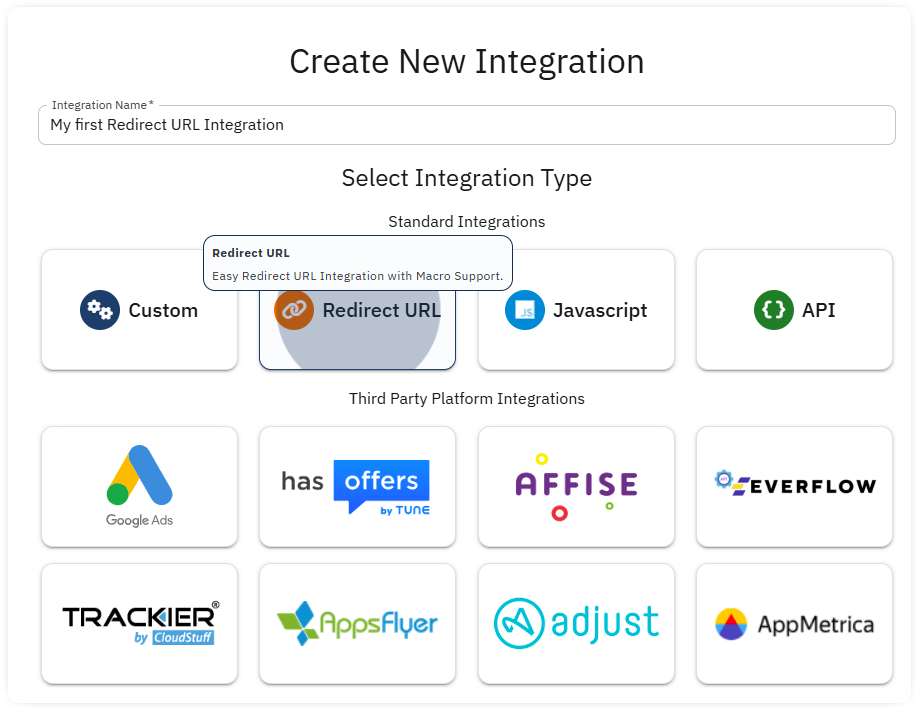
- Select "Redirect URL" from the integration type options.
- Give your integration a name by filling the field (e.g., “Everflow” or “Custom Lead Gen”).
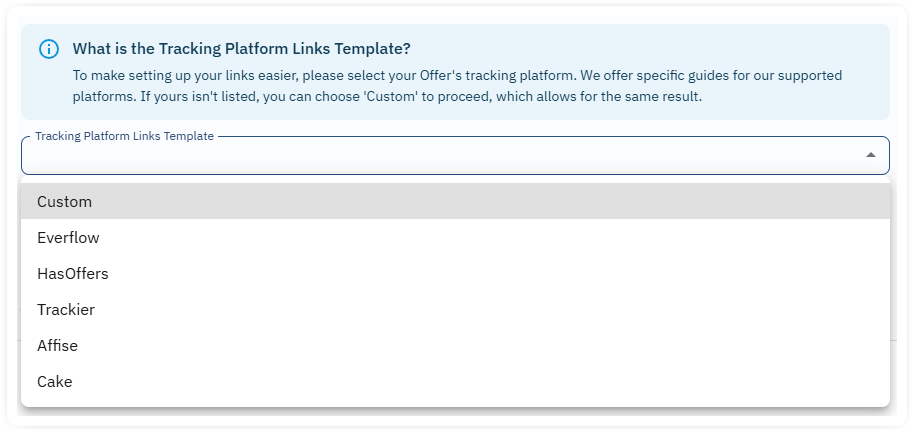
- In the Template Type dropdown menu:
- Choose Custom if you're using a different or proprietary tracking solution.
- OR
- Choose the platform you are currently using (Everflow, HasOffers, etc.)
PART 2: Configure Parameters (for Custom Type Only)
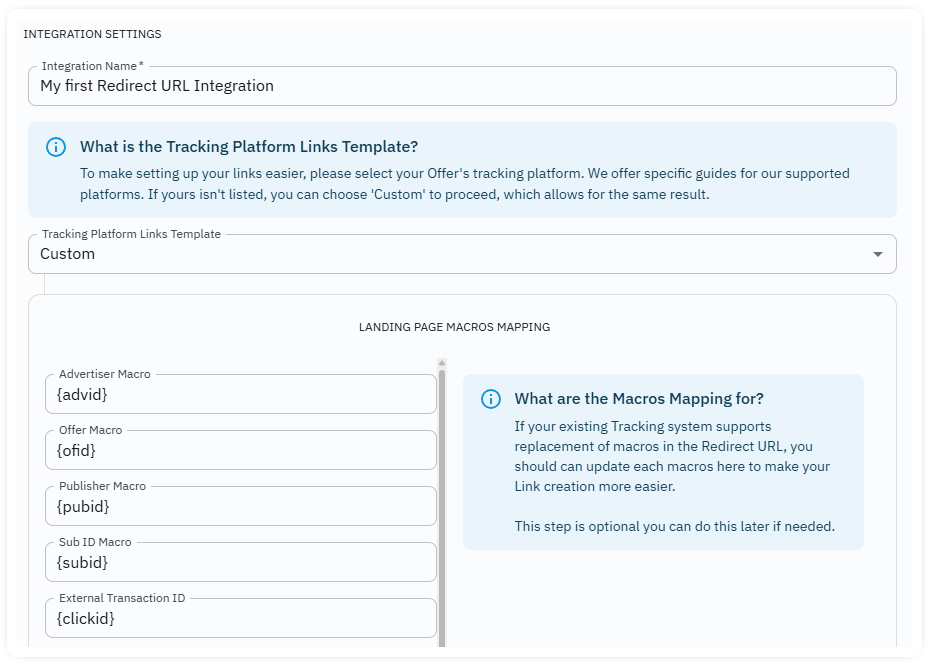
If you selected any listed platform, the mapping is not required as the Redirect URL integration is already set by default with the selected platform parameters. If you selected Custom, you’ll now need to manually set up the parameter mappings:
- Map your tracking parameters:
- For example:
- publisher → {affid}
- external_transaction_id → {clickid}
- sub_id → {sub1}
- device_id → {device_id}
- These should match what your tracking platform uses.
- For example:
Make sure your parameter in 24Metrics match exactly with what your platform expects. If you’re unsure, check your platform’s URL parameter documentation or reach out to support.
- Click Save to confirm the general parameter setup.
PART 3: Create a Protected Link
Once configured, this will be the actual link that will go through 24Metrics for fraud screening.
- Inside the Links tab of your integration, click +Create.
- Add a Name for the link (e.g., “Offer 123 Redirect”).
- Paste your original Offer URL including the mapped parameters (from your tracking platform) into the Landing Page URL field.
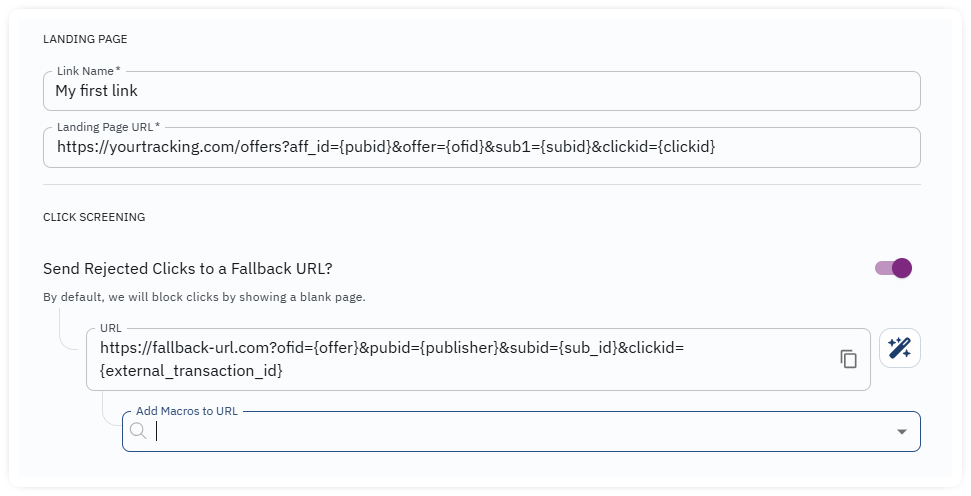
Important:Paste the offer URL exactly as it appears in your platform, with all parameter tokens. Do not modify the URL.
Example: https://yourtracking.com/offers?aff_id={aff_id}&clickid={clickid}&sub1={sub1}&etc={etc}
- Click Save.
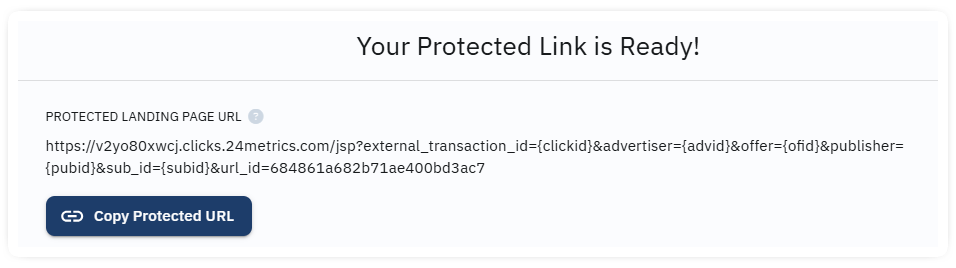
- A new Protected Tracking Link will be generated by 24Metrics.
- Copy the Protected Link and replace your original Offer URL in your tracking platform with this new one.
That’s it! Replace the offer link in your platform with the newly created link.
Your tracking platform will now send traffic through 24Metrics first, which will screen for fraud before redirecting to your actual offer.
Fraud Screening Options

You can now choose how 24Metrics handles fraudulent clicks:
- Block (default): Click is dropped and never reaches the offer.
- Fallback Redirect: Sends the fraudulent clicks to a separate URL (e.g., an error page or dummy offer).
Toggle the Click Screening Mode switch:

- Off: Fraud clicks are blocked.
- On: Fraud clicks are sent to a fallback URL.
If toggled ON, provide the Fallback URL and map any required parameters (optional).
Activating Fraud Filters
Fraud filters live under the Global Filters tab. These are the engines that determine what’s good traffic and what’s not.

Filter Types:
- Geo mismatch
- Bot traffic
- Emulated devices
- VPN/Proxy
- Device integrity
- User-Agent mismatches
- And many more...
How to Configure:
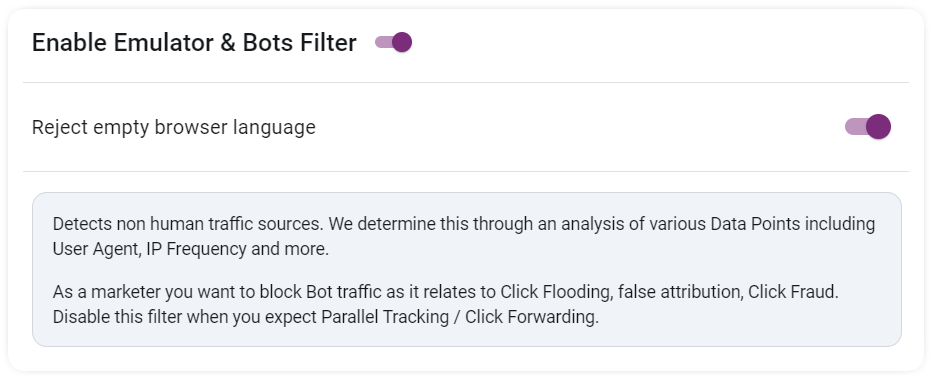
- Go to the Global Filters tab for your Redirect URL Integration.
- Use the toggle switches to enable/disable filters.
- Some filters have adjustable thresholds (e.g., frequency caps).
You can also choose from pre-set profiles for fast setup. Each pre-set profile has already a set of filters already activated and adjusted for the most common cases and best practice that might match your screening strategy as well.

The available profiles are:
- Mobile CPI
- LeadGen (cpa/cpl)
- CPC Campaigns
- Popunder
- Search
- eCommerce
- Google Ads
Blocking vs. Monitoring Mode
You can set fraud screening in two modes:

- Blocking Mode: Fraud clicks are stopped or redirected (if fallback is set).
- Monitoring Mode: Fraud clicks are only tagged/reported but still allowed through.
The Monitoring Mode is very useful if you want to first analyze fraud levels without disrupting campaigns.
Quick Recap of the Flow
Here’s how the traffic flows with 24Metrics in place:
- Affiliate → clicks tracking link in your platform.
- Your tracking link now points to the 24Metrics Protected Link implemented as Offer URL in your platform.
- 24Metrics intercepts the click → scans it for fraud.
- If clean → Redirected to original offer URL (that you set in 24Metrics).
- If fraud → Either blocked or sent to fallback URL (if configured).
Common Mistakes to Avoid
- Don’t manually change parameter tokens in the Offer URL. Just paste it as it is.
- Don’t forget to map the correct macros if using a Custom template.
- Don’t skip enabling fraud filters, otherwise you're not really protecting anything.
Was this article helpful?
That’s Great!
Thank you for your feedback
Sorry! We couldn't be helpful
Thank you for your feedback
Feedback sent
We appreciate your effort and will try to fix the article