¶ Redirect URL Guide
This article will guide you step-by-step on how to set up a Redirect URL integration in 24Metrics. Whether you're using platforms like Everflow, HasOffers, Trackier, Affise, or Cake, or a Custom Tracking Platform, this guide will help you do it right the first time.
¶ How it works
A Redirect URL integration allows 24Metrics to intercept the traffic from your tracking links, screen the traffic for fraud in real time, and then forward only clean clicks to your actual offer (or block/bounce fraud clicks). Think of it like a checkpoint between your tracking platform and your offer.
- Affiliate clicks your tracking link.
- Your tracking link now points to the 24Metrics Protected Link.
- 24Metrics intercepts and scans the click.
- If clean: Redirected to the original offer URL.
- If fraud: Either blocked or sent to fallback URL.
¶ What we will do
| To Do | Action |
|---|---|
| Create Integration | Go to Integrations → +Create → Choose Redirect URL |
| Choose Type | Pick from Platform or Custom Template |
| Parameter Mapping | Only needed for Custom Template |
| Create Link | Copy/paste Offer URL from your platform into 24Metrics |
| Update Platform | Replace Offer URL in your platform with 24Metrics link |
| Enable Filters | Go to Global Filters tab |
| Choose Fraud Action | Block or Redirect via Click Screening |
¶ Integration Setup
¶ Create a Redirect URL Integration
- Go to Integrations section from the main menu.
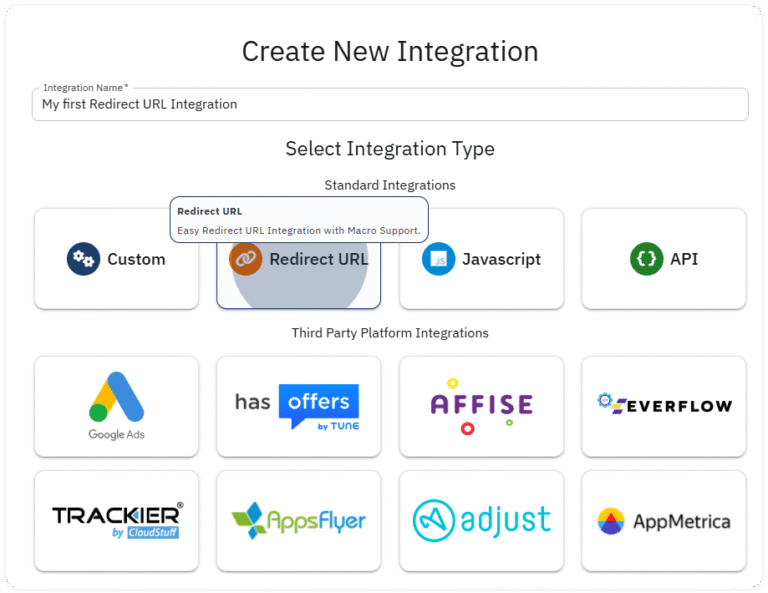
- Click +Create.
- Select "Redirect URL" from the integration type options.
- Give your integration a name (e.g., “Everflow” or “Custom Lead Gen”).
¶ Choosing the correct Platform type to Integrate
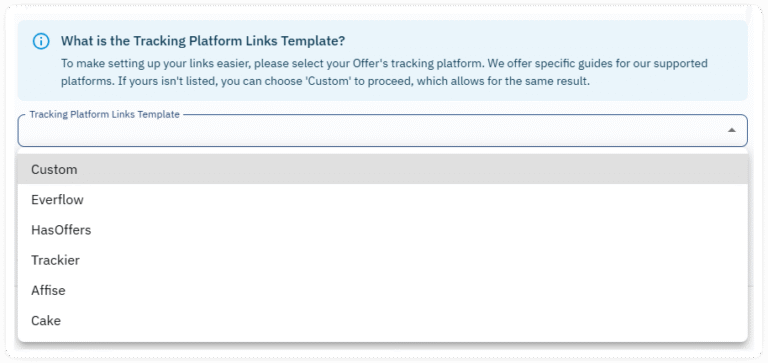
In the Template Type dropdown menu:
- Choose your current platform: Everflow, HasOffers, Affise, etc.
- Choose Custom if you're using a proprietary tracking solution that is not supported.
You can change this setting anytime. However, if you have been using the Integration for a long time and you already have a lot of Links created, we highly recommend to just create a new Integration instead.
¶ Custom Parameter Mapping
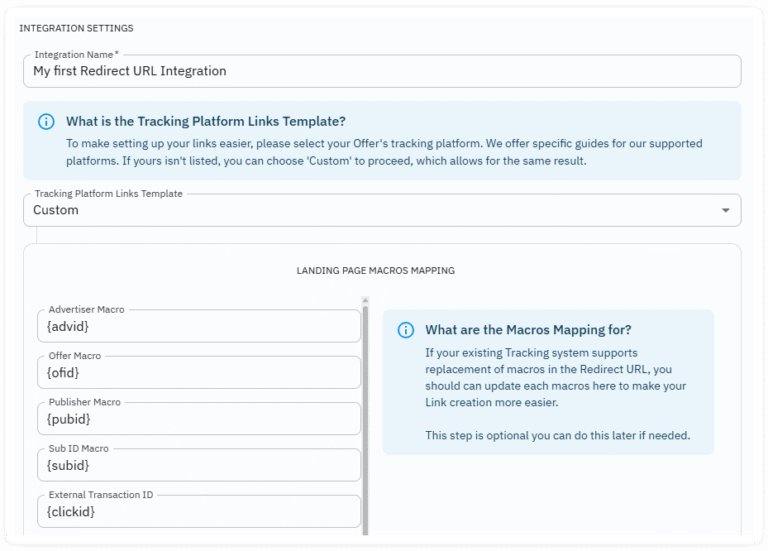
If you have chosen Custom, you will have to manually define all parameters and macros used in your platform (e.g., clickid, subid, device_id, etc.). Use this if you're using any other platform or a custom-built solution.
Example Mapping:
- publisher →
{affid} - external_transaction_id →
{clickid} - sub_id → {
sub1} - device_id →
{device_id}
Ensure your parameters match exactly with what your platform expects. If unsure, check your platform’s URL parameter documentation or reach out to support. Click Save to confirm.
¶ Platform Specific Parameter Mapping
You do not have to do anything.
If you choose any of the platforms supported. We have already pre-configured parameter mapping for these platforms:
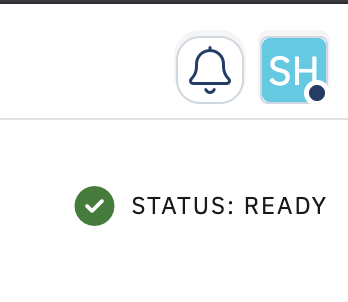
¶ Wait for your Integration to be ready
You must wait for up to 20 minutes before you can use your Integration. You can see the status at the top right of the Integration page. Once you see it is ready, you can follow the next steps.
¶ Create a Protected Link for your Offer
¶ Overview
To protect your Offers or landing pages with our fraud detection you must create a Link. At the end of the creation, you will get a unique Protected link from us. You must do this for each Offer or landing page that you want to protect.
¶ Prerequisite
First, go to your platform's UI where the Offer URL is configured. Copy the destination URL including all the parameters. This may include parameter macros if there is any. Ensure to copy that as well.
¶ Creating the Link
Now back to the 24metrics UI, you must do the following:
- Go to the Links tab of your integration, click Create.
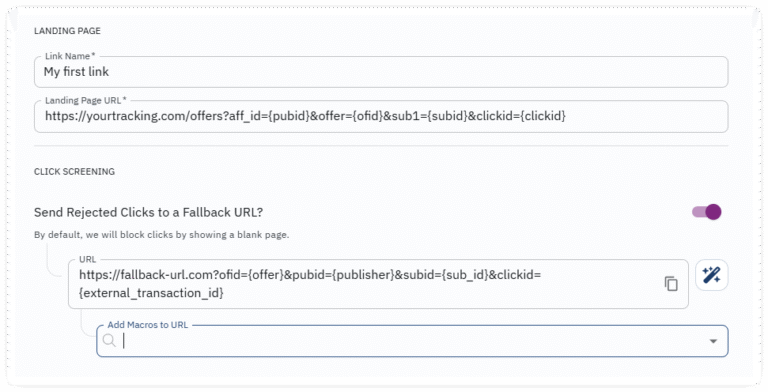
- Add a name for your Link. It is recommended that you name it the same as how it was named in your platform.
- Paste the link you copied earlier from your platform's UI into the Landing Page URL field. Paste it exactly as it appears in your platform.
- Click Screening (optional) - In Click Screening settings, if you want to send fraud clicks to another URL, you can put that URL here. You can also add parameter macros in this URL. Whatever you choose here, when the click is rejected, the click will never reach the Offer:
- Block (default): Click is shown a blank page set by our system.
- Fallback Redirect: Click gets redirected to the URL you added.
- Click Save.
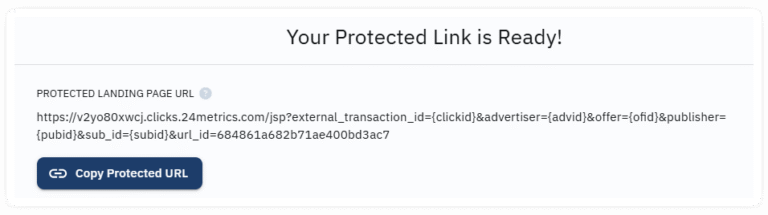
- A new Protected Landing Page URL will be generated by 24Metrics. Copy this.
- Go back to your platform's UI where we copied the original link. Paste and replace the original link with the new modified link or landing page URL.
¶ Testing the Integration
- From your platform's Offer UI, generate a click tracking link like how you normally would.
- Create a click using that tracking link using your browser.
- If you see a blank page or you are redirected to the Fallback URL you added in the previous step, the click is rejected the fraud detection worked.
- Go to our Click Report Page, and you should see a new Click record after a few seconds.
¶ Known Issues
- Connection is not secured.
- This site can’t be reached.
If you have encountered these problems while testing, please ensure that you have waited up to 20 minutes since when the Integration was created. If the issue persists, please reach out to us.
¶ Configuring Fraud Protection
Fraud protection can be setup under the Global Filters tab. With 24metrics, you can use the following useful Filters to improve the quality of your Offer's traffic:
- Geo mismatch
- Bot traffic
- Emulated devices
- VPN/Proxy
- Device integrity
- User-Agent mismatches
- And many more...
All information in this guide also applies when you use the advanced Filter Group feature.
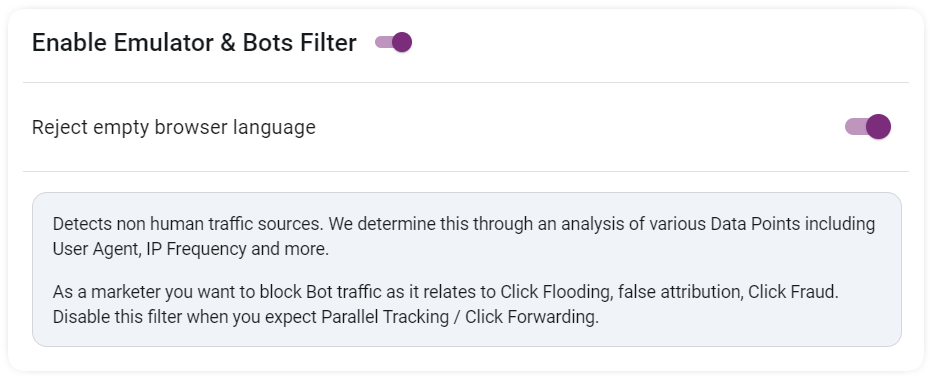
¶ Example: Enabling Bot Protection
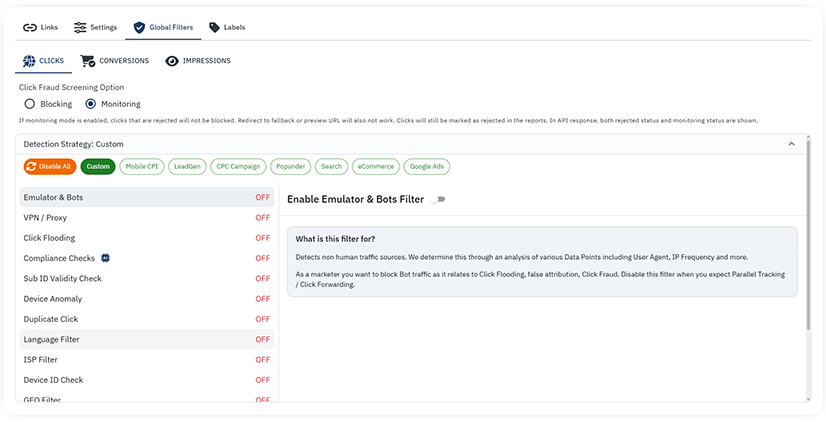
- Go to Global Filters tab.
- Use toggles to enable/disable Filters.
- Adjust thresholds where available.
- You can also use pre-set profiles for quick setup.
¶ Using a Detection Strategy Preset
Configuring the Filters can be time intensive to understand. This is why we have created well-known filtering patterns as presets. These presets have been proven effective by our customers globally. You can still customize the preset after you have chosen one.

- Mobile CPI
- LeadGen (CPA/CPL)
- CPC Campaigns
- Popunder
- Search
- eCommerce
- Google Ads
¶ Filter Blocking vs Monitoring Mode

¶ Monitoring Mode
This is the safe option if you want to analyze fraud insights of the Offer traffic before. If you turn this on, rejected clicks will not be redirected or blocked. However, you will still see in the Reports that the click is rejected.
¶ Blocking Mode (Default)
When the Fraud detection group is using blocking mode. Fraud clicks will be rejected or redirected.
¶ Common Mistakes to Avoid
- Don’t manually change parameter tokens in the Offer URL.
- Don’t forget to map correct macros if using a Custom Template.
- Don’t skip enabling fraud filters — otherwise, you’re not protecting anything.