

Filter groups
Configure filter groups to choose which screening rules apply to an integration’s traffic. Global filters provide the fallback. Custom groups let you use different rules for selected offers, publishers and advertisers.
Before you start
Section titled “Before you start”You need an integration, permission to edit its filter groups and a plan that includes the filters you want to use. Confirm that your tracking requests supply the offer, publisher and advertiser identifiers you intend to match. For conversion filters, configure conversion tracking and any required parameter mapping first.
Understanding filter groups
Section titled “Understanding filter groups”Global filters
Section titled “Global filters”The Global row in Filter Groups Management is the integration’s default filter set. You can also open it from the integration’s Global Filters tab. It applies when no custom group matches.
Custom filter groups
Section titled “Custom filter groups”A custom group matches Offers, Publishers, Advertisers, or a combination. An empty matching dimension accepts any value for that dimension. Every non-empty dimension must match the request; matching only the offer is not enough if the group also restricts publishers.
Execution order and priority
Section titled “Execution order and priority”Custom groups are evaluated in ascending priority order: the lower priority number wins. The first group matching all configured dimensions supplies the filters. Matching groups do not stack, and Global filters are not applied in addition to the selected group. Use the arrows in the Priority column to change precedence.
For example, put a group for offer offer-demo and publisher publisher-demo before a broader group matching only offer-demo. Otherwise the broader group can match first.
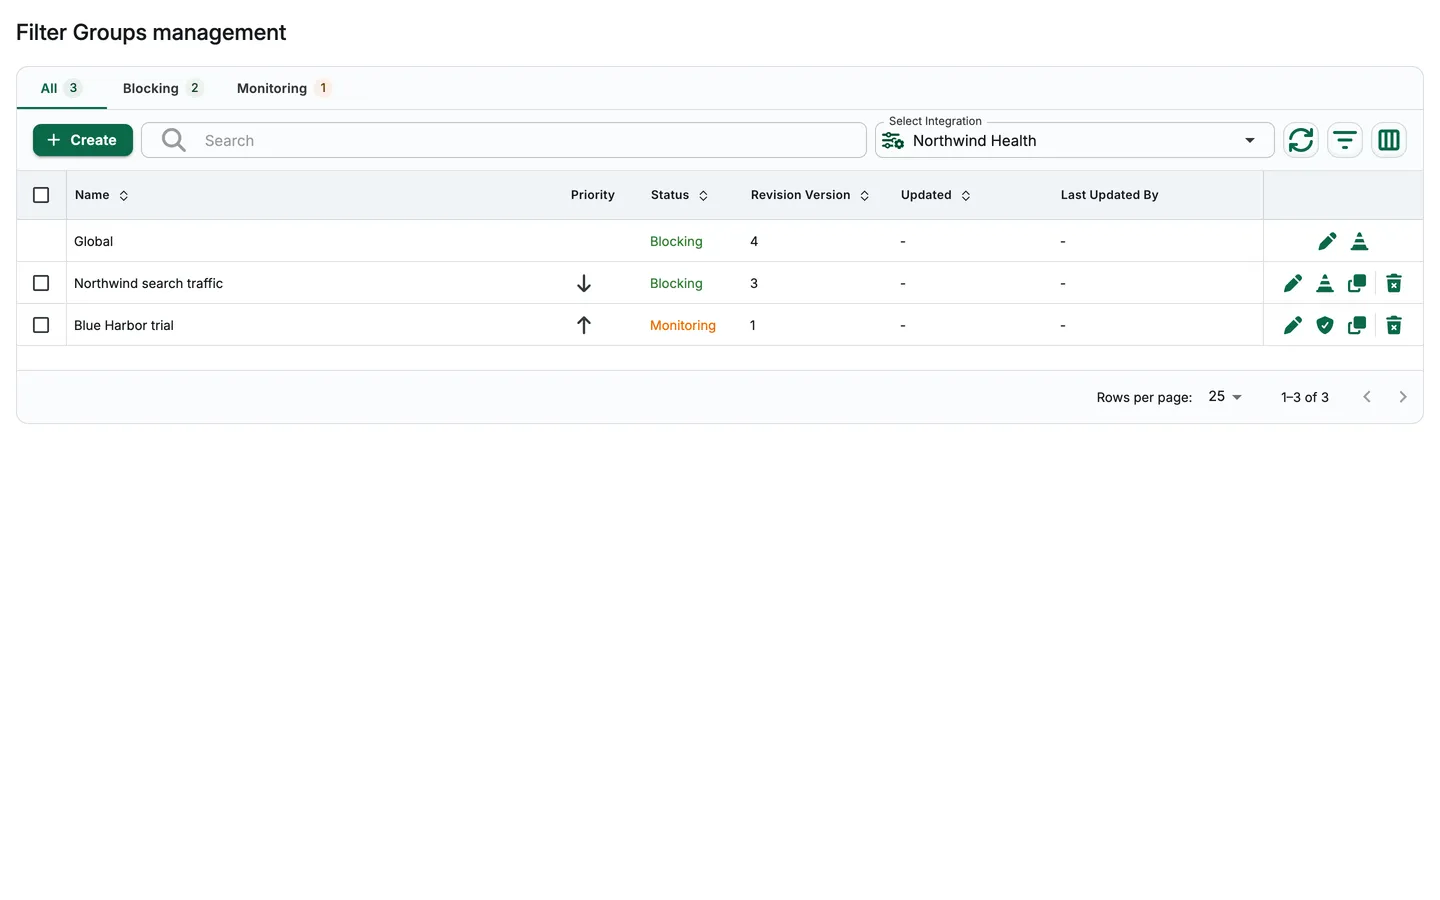
Create a filter group
Section titled “Create a filter group”- Open Filter Groups > Filter Groups Management and choose the integration in Select Integration.
- Select Create. In General, enter Name and an optional Description, then configure the offer, publisher and advertiser matching you need. Leave a dimension unrestricted only when it should match all traffic for that dimension.
- Under Click Fraud Screening Options (Prevention / Detection), use Enable Blocking or Enable Monitoring to choose the mode. Monitoring records rejected clicks in reports without blocking them; Blocking enforces rejection according to the integration’s rejection handling.
- Select Add Filters. Enable filters for the relevant event types. Open a card to configure its settings in a drawer.
- Select Done to close each drawer, then Create Filter Group to save the group. Closing a drawer alone does not save the group.
Edit filters and settings
Section titled “Edit filters and settings”Open an existing group’s edit action. Use Filters for the catalog and filter configuration, and Settings for the group’s general configuration. Global filters use the same catalog editor.
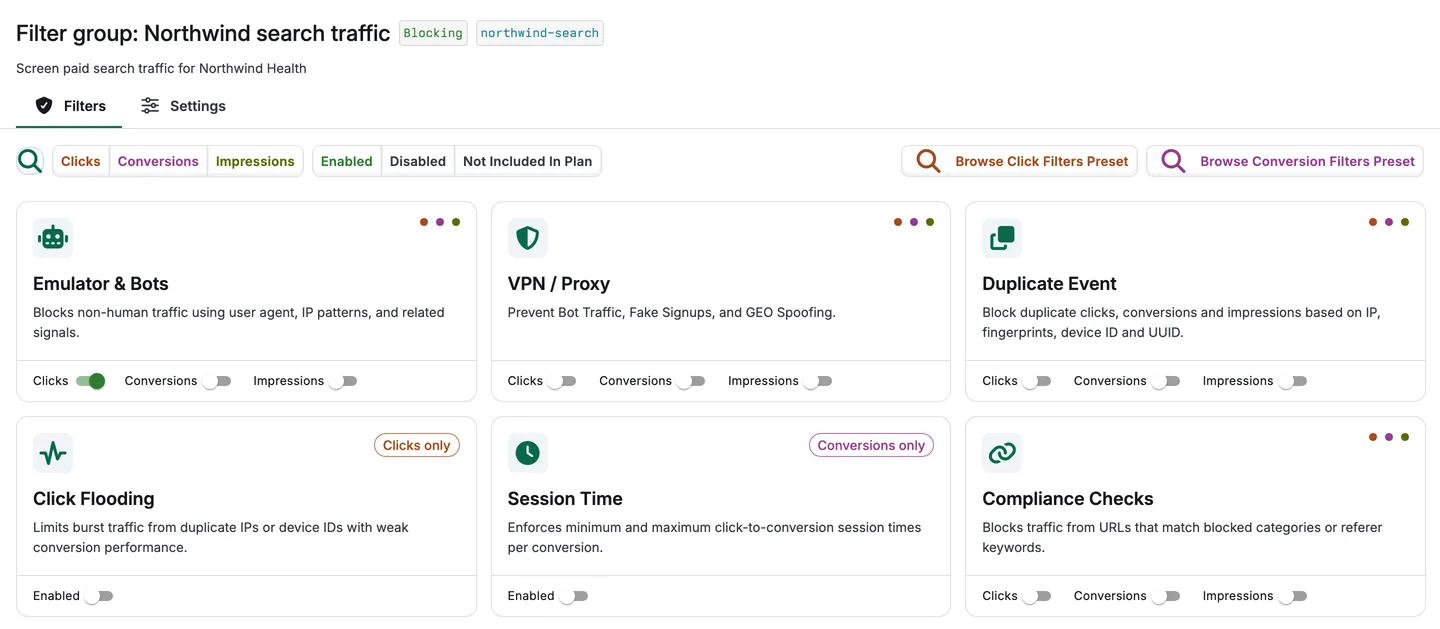
Use the event selectors available for your integration to narrow the catalog: Clicks, Conversions and Impressions where supported. Google Ads groups are clicks-only and do not offer conversion or impression controls. A multi-event card has separate switches and drawer tabs for each supported event type. Enabling the click filter does not enable its conversion counterpart.
Open a card, choose its event tab and configure the visible controls. Select Done, then use the page-level Save changes action. Drawer changes remain unsaved until the page action succeeds.
Browse presets
Section titled “Browse presets”Use Browse Click Filters Preset and, where the integration supports conversions, Browse Conversion Filters Preset separately. Google Ads offers click preset browsing only. Review the filters and values in a preset before applying it, then select Save changes. Preset availability depends on the account; the names shown in your menu are the current choices, not a fixed list in this guide.
Result and next steps
Section titled “Result and next steps”After saving, reopen the group and confirm its matching rules, mode and event-specific filter settings. Check the Global row separately if you changed the default filters.
Start new rules in Monitoring when you need to assess their impact. Review reports for unexpected rejections before switching to Blocking. For filter-specific inputs and examples, return to the filter list.