

Click reports
Use Click Report to inspect individual clicks and recorded screening decisions. You need read access to the selected integration. Rejected does not prove fraud, and the Approved label does not establish payability.
Click report
Section titled “Click report”- Open Reports → Clicks Report. The page heading is Click Report.
- Select an integration and date range; check the displayed timezone.
- Apply a publisher, offer, Sub ID, Click IP, or rejection filter.
- Use Edit Columns to select the fields you need and paginate through results.
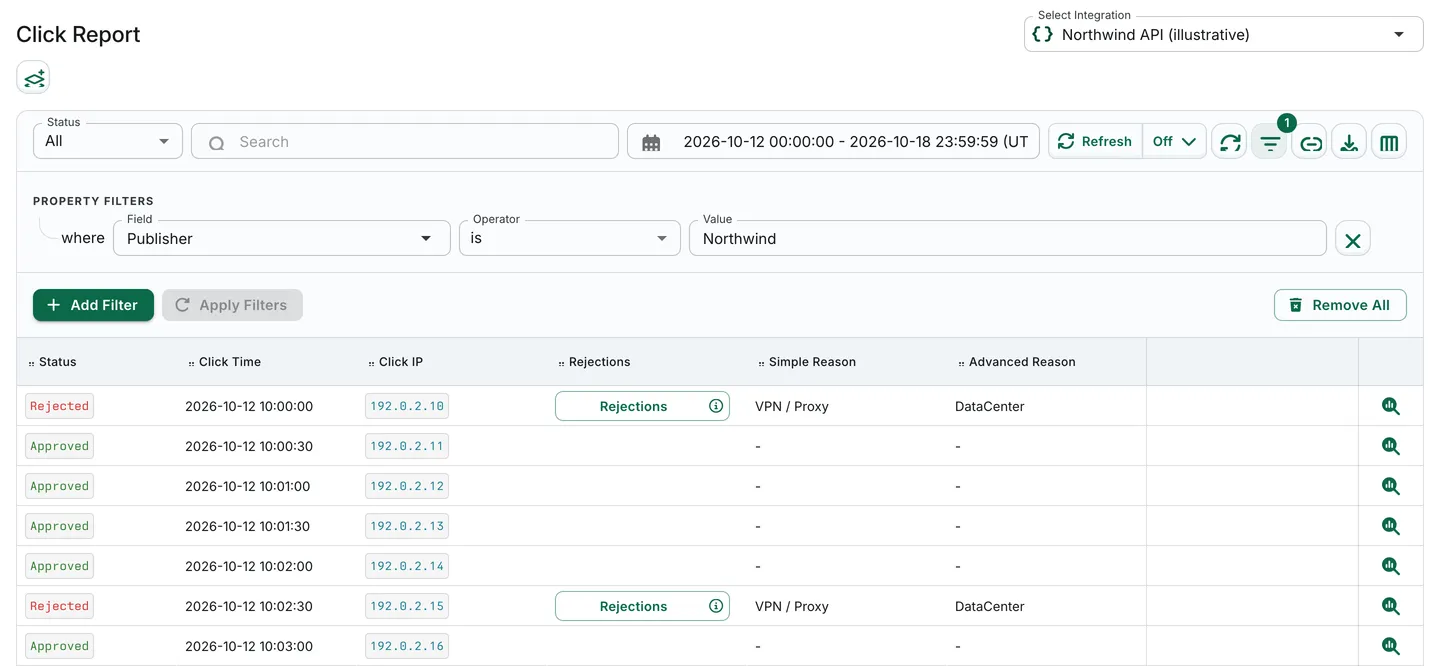
Illustrative synthetic Northwind records, not a real incident.
Key features
Section titled “Key features”Status and reasons
Section titled “Status and reasons”Keep these fields distinct:
- Status shows the recorded outcome; the top-level selector offers Approved and Rejected, not Pending.
- Rejection Type classifies the rejection.
- Rejected Simple Reason and Rejected Advanced Reason show selected reason descriptions.
- Rejections opens the full recorded list of triggered reasons, which may overlap.
The displayed reason does not show which triggered check took precedence. Do not count all reason occurrences as unique clicks.
Filters and columns
Section titled “Filters and columns”Available filters include advertiser, publisher, offer, Sub IDs, filter group, rejection attributes, Risk, Score, location, ISP, ASN, Click IP, referer and categories, user agent, browser, OS, proxy type, device identifiers, and extra parameters. Options depend on the field and available data.
Use narrower date ranges and filters for focused review. Results are paginated. The date picker limits which dates you can select; it does not indicate how long data is retained.
Investigation example
Section titled “Investigation example”In the fictional Northwind review, compare a rejected row’s simple reason with Rejections, then filter by its Click IP to inspect related rows. Use View Click Details for row context. An IP shared by several rows does not by itself prove an attack or a common actor. Review VPN and residential proxy checks and ISP rules before drawing conclusions.
For a separate, manual lookup, use the IP reputation checker. Enter an address yourself only when appropriate to share it; current reputation is context, not proof of past fraud.
Export results
Section titled “Export results”Use Export to queue selected fields and filters, then retrieve the file from Download center. See Export reports for the full workflow.